How to Fix Irrigation System in 5 Easy Steps
Fix irrigation system repair issues fast with these 5 easy steps for better lawn health and water savings.
How to Fix Irrigation System in 5 Easy Steps
Why Irrigation System Repair Matters More Than You Think
Irrigation system repair is one of those home maintenance tasks that's easy to put off — until a soggy yard, a sky-high water bill, or a patch of dead grass forces your hand. The good news? Most sprinkler problems are fixable with the right knowledge and the right help.
Here's a quick overview of the most common irrigation issues and how to fix them:
- Broken or clogged sprinkler heads - Clean or replace the affected head
- Leaking underground pipes - Locate the leak and repair or replace the damaged section
- Faulty valves or solenoids - Test electrically and replace if not opening or closing properly
- Controller or timer problems - Reprogram or upgrade to a smart WiFi controller
- Low or uneven water pressure - Check for blockages, leaks, or pressure regulator issues
- Soggy spots or dry patches - Adjust spray patterns and verify zone coverage
Most homeowners don't realize how much a struggling irrigation system costs them. Studies show that up to 50% of residential irrigation water is wasted due to inefficient systems and poor upkeep. That's not just bad for your lawn — it's bad for your wallet and the environment.
The fix doesn't have to be complicated. Whether you're dealing with one sputtering head or a zone that stopped working entirely, this guide walks you through five straightforward steps to get your system back on track.
Quick irrigation system repair definitions:
- foundation repair estimate
- home improvement marketplace
Identifying Signs Your Sprinkler System Needs Help
Most irrigation systems do not fail all at once. They usually drop hints first. Unfortunately, those hints often look like "my lawn is being weird."
Watch for these common signs:
- Soggy spots or standing water in one area
- Brown patches or stressed plants in another area
- Sprinkler heads that sputter, spit, or do not pop up fully
- A sudden rise in water use
- Low pressure in one zone or across the whole system
- Uneven coverage, where half the lawn gets a shower and the other half gets a light mist
- Unusual grass growth patterns, including extra-green strips near hidden leaks
A leaking valve, cracked lateral line, clogged nozzle, or failing controller can all create these symptoms. Sometimes the problem is obvious, like a broken head spraying the sidewalk. Other times, the issue is underground and only shows up as wet soil or inconsistent pressure.
If you need local help evaluating those warning signs, browsing lawn and garden care professionals can be a practical starting point.
One important note: overwatering can be just as damaging as underwatering. Too much water encourages shallow roots, disease, and waste. A healthy irrigation system is not just about "more water." It is about the right water in the right place at the right time.
5 Steps for Effective Irrigation System Repair
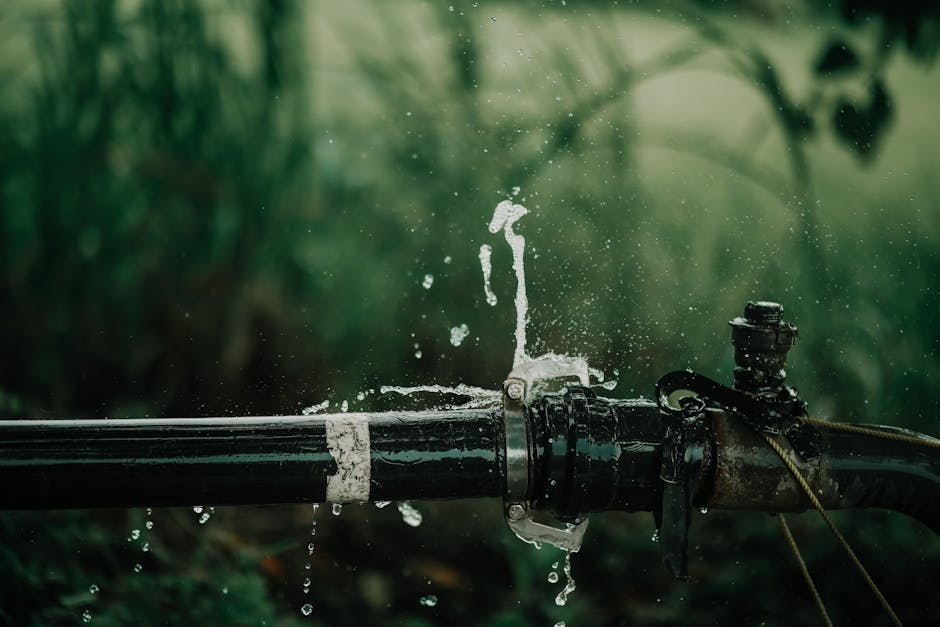
Before replacing random parts and hoping for the best, we recommend a simple process: inspect, isolate, repair, and test. A zone-by-zone inspection saves time and prevents the classic homeowner move of replacing a perfectly good sprinkler head while the real problem is a stuck valve two feet away.
If you want support finding a qualified local pro, The Builder Market can help you connect with lawn and garden care services in your area.
| Common problem | Likely primary cause |
|---|---|
| Head will not spray | Clog, broken riser, low pressure, shut valve |
| Head leaks constantly | Worn seal, debris, valve not closing |
| One zone will not turn on | Solenoid, wiring, controller, valve failure |
| Wet spot in yard | Underground pipe leak or cracked fitting |
| Uneven watering | Misaligned heads, wrong nozzle, pressure imbalance |
| All zones act erratic | Controller issue, main supply problem, backflow issue |
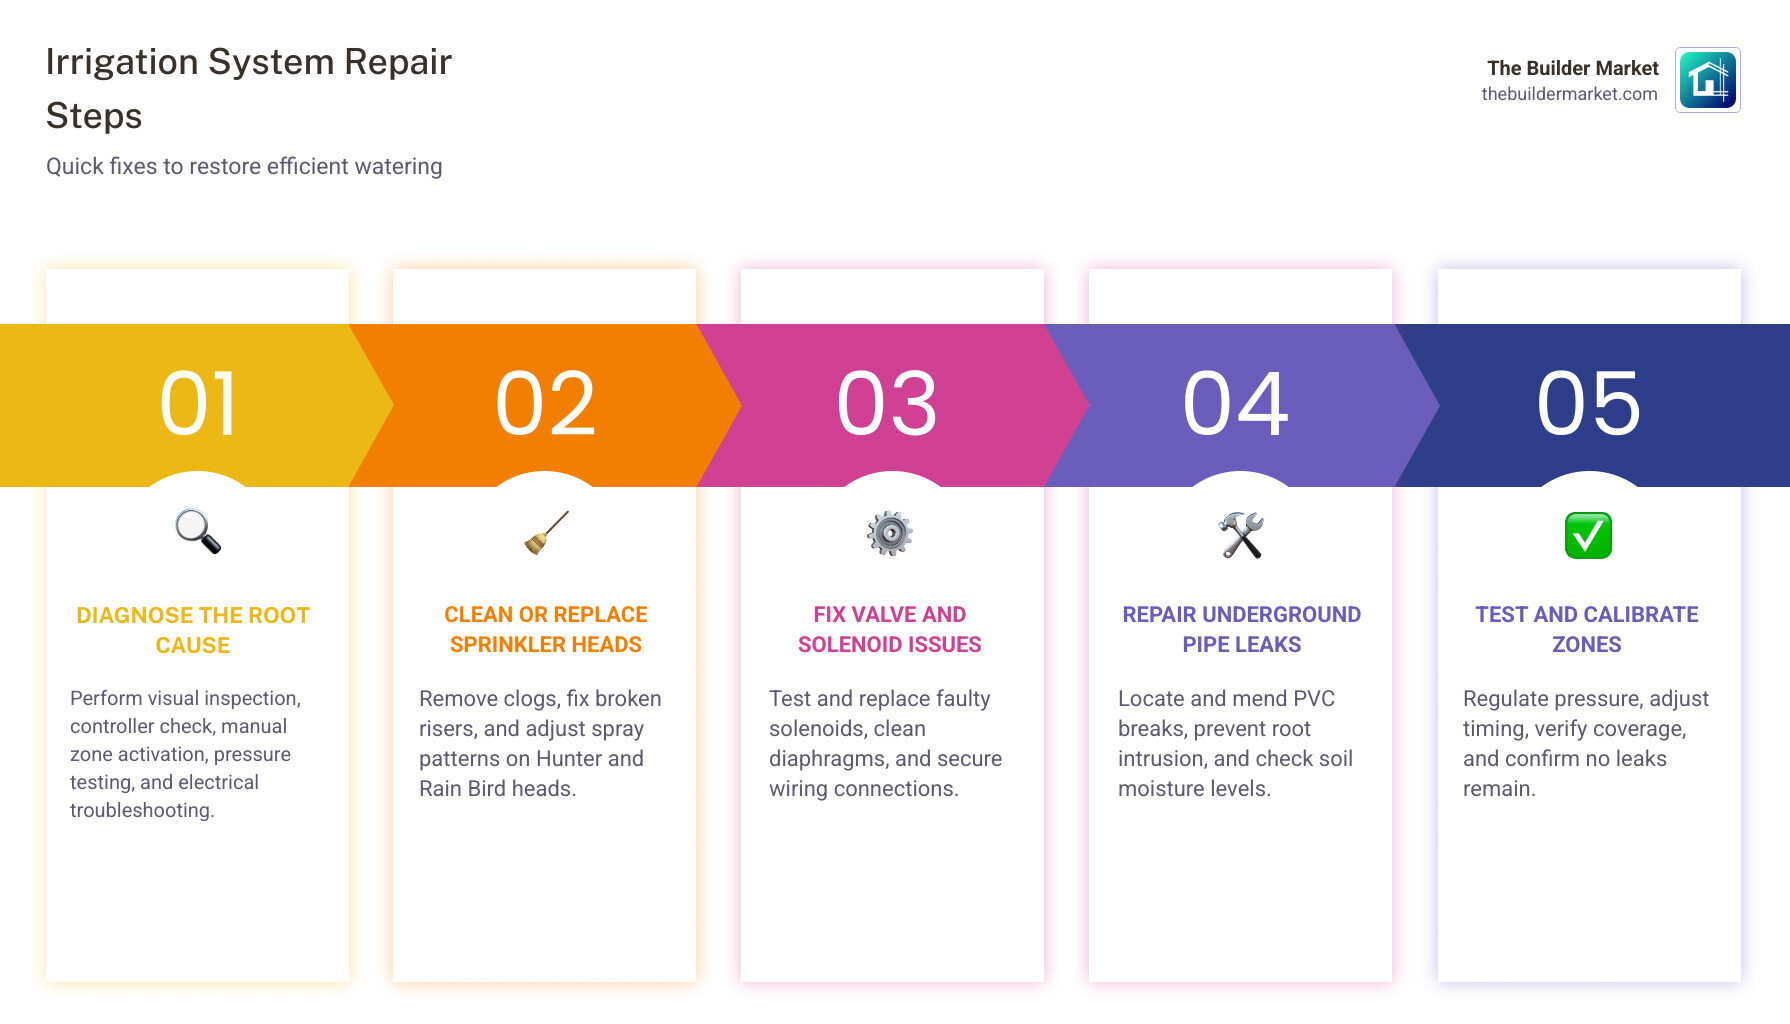
Step 1: Diagnose the Root Cause
Start with the basics.
- Run each zone manually at the controller.
- Walk the zone while it is operating.
- Look for leaks, weak spray, heads that stay down, and puddling.
- Check whether the controller time, date, and schedule are correct.
- Inspect the wiring at the controller if a zone does not respond.
This step matters because many irrigation problems overlap. For example:
- A dry patch could be caused by a clogged nozzle, poor head spacing, or a valve not opening fully.
- A leaking head might actually point to a valve that is letting water pass after the cycle ends.
- Low pressure can come from a pipe break, too many heads on one zone, or a regulator problem.
If you suspect an electrical issue, use a multimeter only if you are comfortable doing so safely. Faulty common wire connections, damaged underground wiring, and failed solenoids are common causes of dead zones. For more advanced diagnostics, especially if several zones are affected, it may be smarter to stop digging and start calling.
Pressure testing also helps. If one zone is much weaker than the others, compare head performance and look for a hidden break between heads. Wet soil, greener grass, or soft ground usually points in the right direction.
Step 2: Clean or Replace Sprinkler Heads
Sprinkler heads take a beating from mowers, foot traffic, pets, compacted soil, and weather. They are one of the most common points of failure in any irrigation system repair job.
Check for:
- Clogged nozzles
- Tilted or sunken heads
- Cracked casings
- Broken risers
- Heads that do not retract properly
- Mismatched nozzles causing too much or too little water
To clean a head:
- Turn off the zone.
- Pull up the stem.
- Remove the nozzle or filter screen if accessible.
- Rinse out dirt and debris.
- Reassemble and test.
To replace a damaged head:
- Dig carefully around the body.
- Unscrew the broken head from the riser.
- Install a matching replacement with the same spray pattern and precipitation rate.
- Set the height flush with grade.
- Adjust the arc and direction.
Use compatible commercial-grade parts when possible. Common residential systems often use rotor or spray heads from major irrigation brands, and replacement parts need to match the application. The goal is even coverage, not a freestyle water show pointed at the driveway.
If a head stays up after watering, the cause may be grit in the seal, physical damage, or low spring tension. If multiple heads on the same zone fail to retract, low pressure or valve issues may be part of the story.
Step 3: Address Valve and Solenoid Issues
Valves are the traffic cops of your system. If one gets stuck, clogged, or fails electrically, an entire zone can stop working or keep running when it should not.
Common valve symptoms include:
- A zone that will not turn on
- A zone that will not turn off
- Constant leaking from one or more heads after the cycle ends
- Buzzing or clicking with no water flow
- Intermittent performance
Typical fixes include:
- Cleaning debris from the valve diaphragm
- Replacing a failed solenoid
- Tightening or repairing wire connections
- Rebuilding or replacing the valve if the body is cracked or worn
Start by locating the valve box. Keep it clear of mulch, grass, and soil so it stays accessible. Open the box and inspect for standing water, broken wires, or obvious damage. Manually bleed the valve if your model allows it. If the zone activates manually but not from the controller, the issue is likely electrical. If it still does not work manually, the valve itself may be the problem.
A stuck-open valve can waste a surprising amount of water. It can also make homeowners think a sprinkler head is bad when the real culprit is the valve not sealing shut.
For homeowners who prefer help with valve troubleshooting and related landscaping issues, you can explore local lawn and garden care options.
Step 4: Repair Underground Pipe Leaks
Underground leaks are sneaky. They do not always create a dramatic geyser. Often, they show up as:
- Soggy soil
- Mushy turf
- A hissing sound underground
- Lower pressure in one zone
- Unusually green growth in one strip of lawn
- Higher water use without an obvious cause
To repair a buried line:
- Run the affected zone until you identify the leak area.
- Dig carefully to expose the pipe and fittings.
- Cut out the damaged section cleanly.
- Replace it with matching pipe and approved fittings.
- Allow connections to set properly if using solvent-weld PVC.
- Test before backfilling.
Common causes include freeze damage in colder climates, root intrusion, shifting soil, accidental shovel strikes, and normal wear at fittings. Main line leaks are more urgent than lateral line leaks because they may leak even when the system is off.
Some contractors use lower-disruption methods for certain repairs and installations, which can help reduce lawn damage. That can be especially helpful in established landscapes where nobody wants a repair to turn into a mini excavation site.
If you need support finding yard and landscape help, browse local lawn and garden care professionals.
Step 5: Test and Calibrate the Zones
Do not skip the final test. A repaired system that is not calibrated is like fixing your glasses and then wearing them upside down.
After repairs:
- Run every zone
- Confirm each head pops up and retracts
- Check for leaks at fittings and around valves
- Verify proper arc, distance, and direction
- Make sure water is not spraying hardscape, fences, or the side of the house
- Adjust timing based on season, plant type, sun exposure, and local conditions
This is also the time to correct poor scheduling. Watering deeply and less frequently is generally better than short daily cycles for many lawns and shrubs. Morning watering is usually best because it reduces evaporation and lowers disease risk compared with watering late at night.
Regular tune-ups can extend irrigation component life by 5 to 10 years, and proper maintenance can reduce water use by up to 30%. That is a strong argument for spending a little time testing now instead of paying for bigger repairs later.
Upgrading to Smart Water-Saving Technology
A repair is often the perfect time for an upgrade.
Smart irrigation technology can make your system more efficient, more convenient, and less wasteful. Research shows smart controllers can reduce water waste by 20% to 50% compared with traditional timers, especially when paired with rain or soil moisture sensors.
Useful upgrades include:
- WiFi-enabled smart controllers
- Rain sensors
- Soil moisture sensors
- Weather-based automation
- Pressure-regulated heads
- Drip conversion for beds, shrubs, and trees
Benefits of smart upgrades:
- Automatically skip watering after rainfall
- Adjust schedules based on local weather
- Reduce runoff and overwatering
- Improve plant health through more precise scheduling
- Allow remote control from a phone or tablet
Drip irrigation is often more efficient than spray irrigation for planting beds, shrubs, and trees because it applies water slowly and directly to the root zone. Spray heads are usually better suited to turf when spaced and adjusted correctly. Matching the system type to the landscape matters just as much as repairing broken parts.
If you are considering a modernization project, you can explore lawn and garden care services and compare options for your property.
EPA WaterSense-aligned practices, weather-based automation, and sensor-based shutoffs are especially helpful in areas with seasonal drought concerns, watering restrictions, or rising utility use. In 2026, that is not a luxury upgrade for many homeowners. It is just smart lawn math.
Professional Maintenance vs. DIY Solutions
DIY fixes can absolutely make sense for basic issues like cleaning a nozzle, straightening a tilted head, or replacing a cracked spray body. But not every irrigation problem should become a weekend science experiment.
A good rule of thumb:
Common Components in Irrigation System Repair
Knowing the major parts helps you understand what can fail and what may need repair or replacement.
Common components include:
- Controller or timer
- Rain or moisture sensor
- Backflow preventer
- Main line
- Lateral lines
- Valves and valve manifold
- Solenoids
- Pressure regulators
- Rotors and spray heads
- Drip tubing and emitters
- Fittings, risers, and swing joints
- Pump, in systems that require one
Each component fails differently. A backflow issue may affect water delivery or require annual testing depending on local rules. A manifold problem can disable multiple zones. Drip emitters may clog rather than crack. Rotor heads may need arc adjustment, while spray heads often need nozzle cleaning or replacement.
If you are also browsing outdoor service options, take a look at lawn and garden care listings.
When to Hire a Pro for Irrigation System Repair
We recommend calling a professional when you are dealing with:
- Complex controller or wiring faults
- Multiple dead zones
- Main line leaks
- Pump failure
- Backflow preventer issues
- Persistent low pressure with no obvious cause
- Underground leaks you cannot isolate
- Seasonal startup or winterization in freeze-prone areas
Professional repair has real benefits:
- Faster, more accurate diagnosis
- Access to professional-grade parts
- Less guesswork and less unnecessary digging
- Safer handling of electrical and backflow issues
- Better long-term water efficiency
- Full system testing after repair
Homeowners spend money every year on irrigation maintenance and repair, but preventive service is usually cheaper than letting a small issue become a yard-wide mess. Most systems benefit from service at least twice a year: a spring startup and inspection, plus fall winterization or seasonal shutdown where freezing temperatures are a concern.
If you want help finding the right fit, The Builder Market makes it easier to connect with trusted local lawn and landscaping professionals through our AI-powered platform.
Frequently Asked Questions
How often should I service my irrigation system?
At minimum, we recommend servicing most irrigation systems twice a year.
- In spring: inspect, pressurize, test zones, clean heads, and confirm programming
- In fall: winterize or shut down as needed in climates with freezing temperatures
During the growing season, it is also smart to do quick monthly walk-throughs. Run each zone and look for clogged heads, misalignment, soggy areas, and dry spots. Small corrections early can prevent major repairs later.
Why is my sprinkler head sputtering or leaking?
A sputtering or leaking head usually points to one of these issues:
- Dirt or debris in the nozzle
- A worn or cracked head
- Low water pressure
- A broken riser
- A valve that is not closing all the way
- Drainage from a low head after the cycle ends
If the leak is continuous, the valve may be the real problem. If the head sputters only on startup, pressure fluctuation or partial blockage may be to blame. Cleaning the head is the easiest first step, but if several heads in the same zone act up, broaden the diagnosis.
Can a smart controller really lower my water bill?
Yes, in many cases it can.
Smart controllers use weather data, seasonal adjustments, and sensor input to avoid unnecessary watering. Research shows these systems can reduce water waste by 20% to 50% compared with standard timers. That does not mean every yard will save the same amount, but smart controls are one of the most effective upgrades for improving irrigation efficiency.
They are especially useful if:
- Your current timer never gets adjusted seasonally
- You travel often
- You have mixed plant types
- Your area gets variable rainfall
- You want better control from your phone
Conclusion
A healthy irrigation system protects your lawn, supports your landscape, and helps avoid wasting water. The key is catching problems early, fixing the real cause, and testing the entire system after every repair.
Whether you are dealing with a clogged head, a bad valve, a hidden pipe leak, or an outdated controller, these five steps can help you approach irrigation system repair with more confidence and less frustration.
And if the project turns out to be bigger than a quick DIY fix, we can help with that too. At The Builder Market, we connect homeowners with vetted local pros through AI-powered matching, direct communication tools, and project support that makes home repairs easier to manage.
You can also browse lawn and garden care professionals near you or find a local irrigation specialist for your home remodel to take the next step.
Need Help?
Contact us today to discuss your needs. Our team is ready to help.
About the Author
The Builder Market
More Articles
View All PostsRelated Articles
Ready to grow with The Builder Market?
Explore listings, AI growth, sites, and lead options—or talk to our team about what fits your business.

